

Mastering the Art of Analog Night Photography: A Comprehensive Guide
As the world settles into the quiet of the night, photographers find themselves presented with a canvas painted in shadows and light. Analog night photography is a dance with time and light, a challenge that demands both technical prowess and artistic vision. In this guide, we'll delve into the technicalities of capturing the night on film, focusing on the critical concept of reciprocity failure and the importance of experimentation.
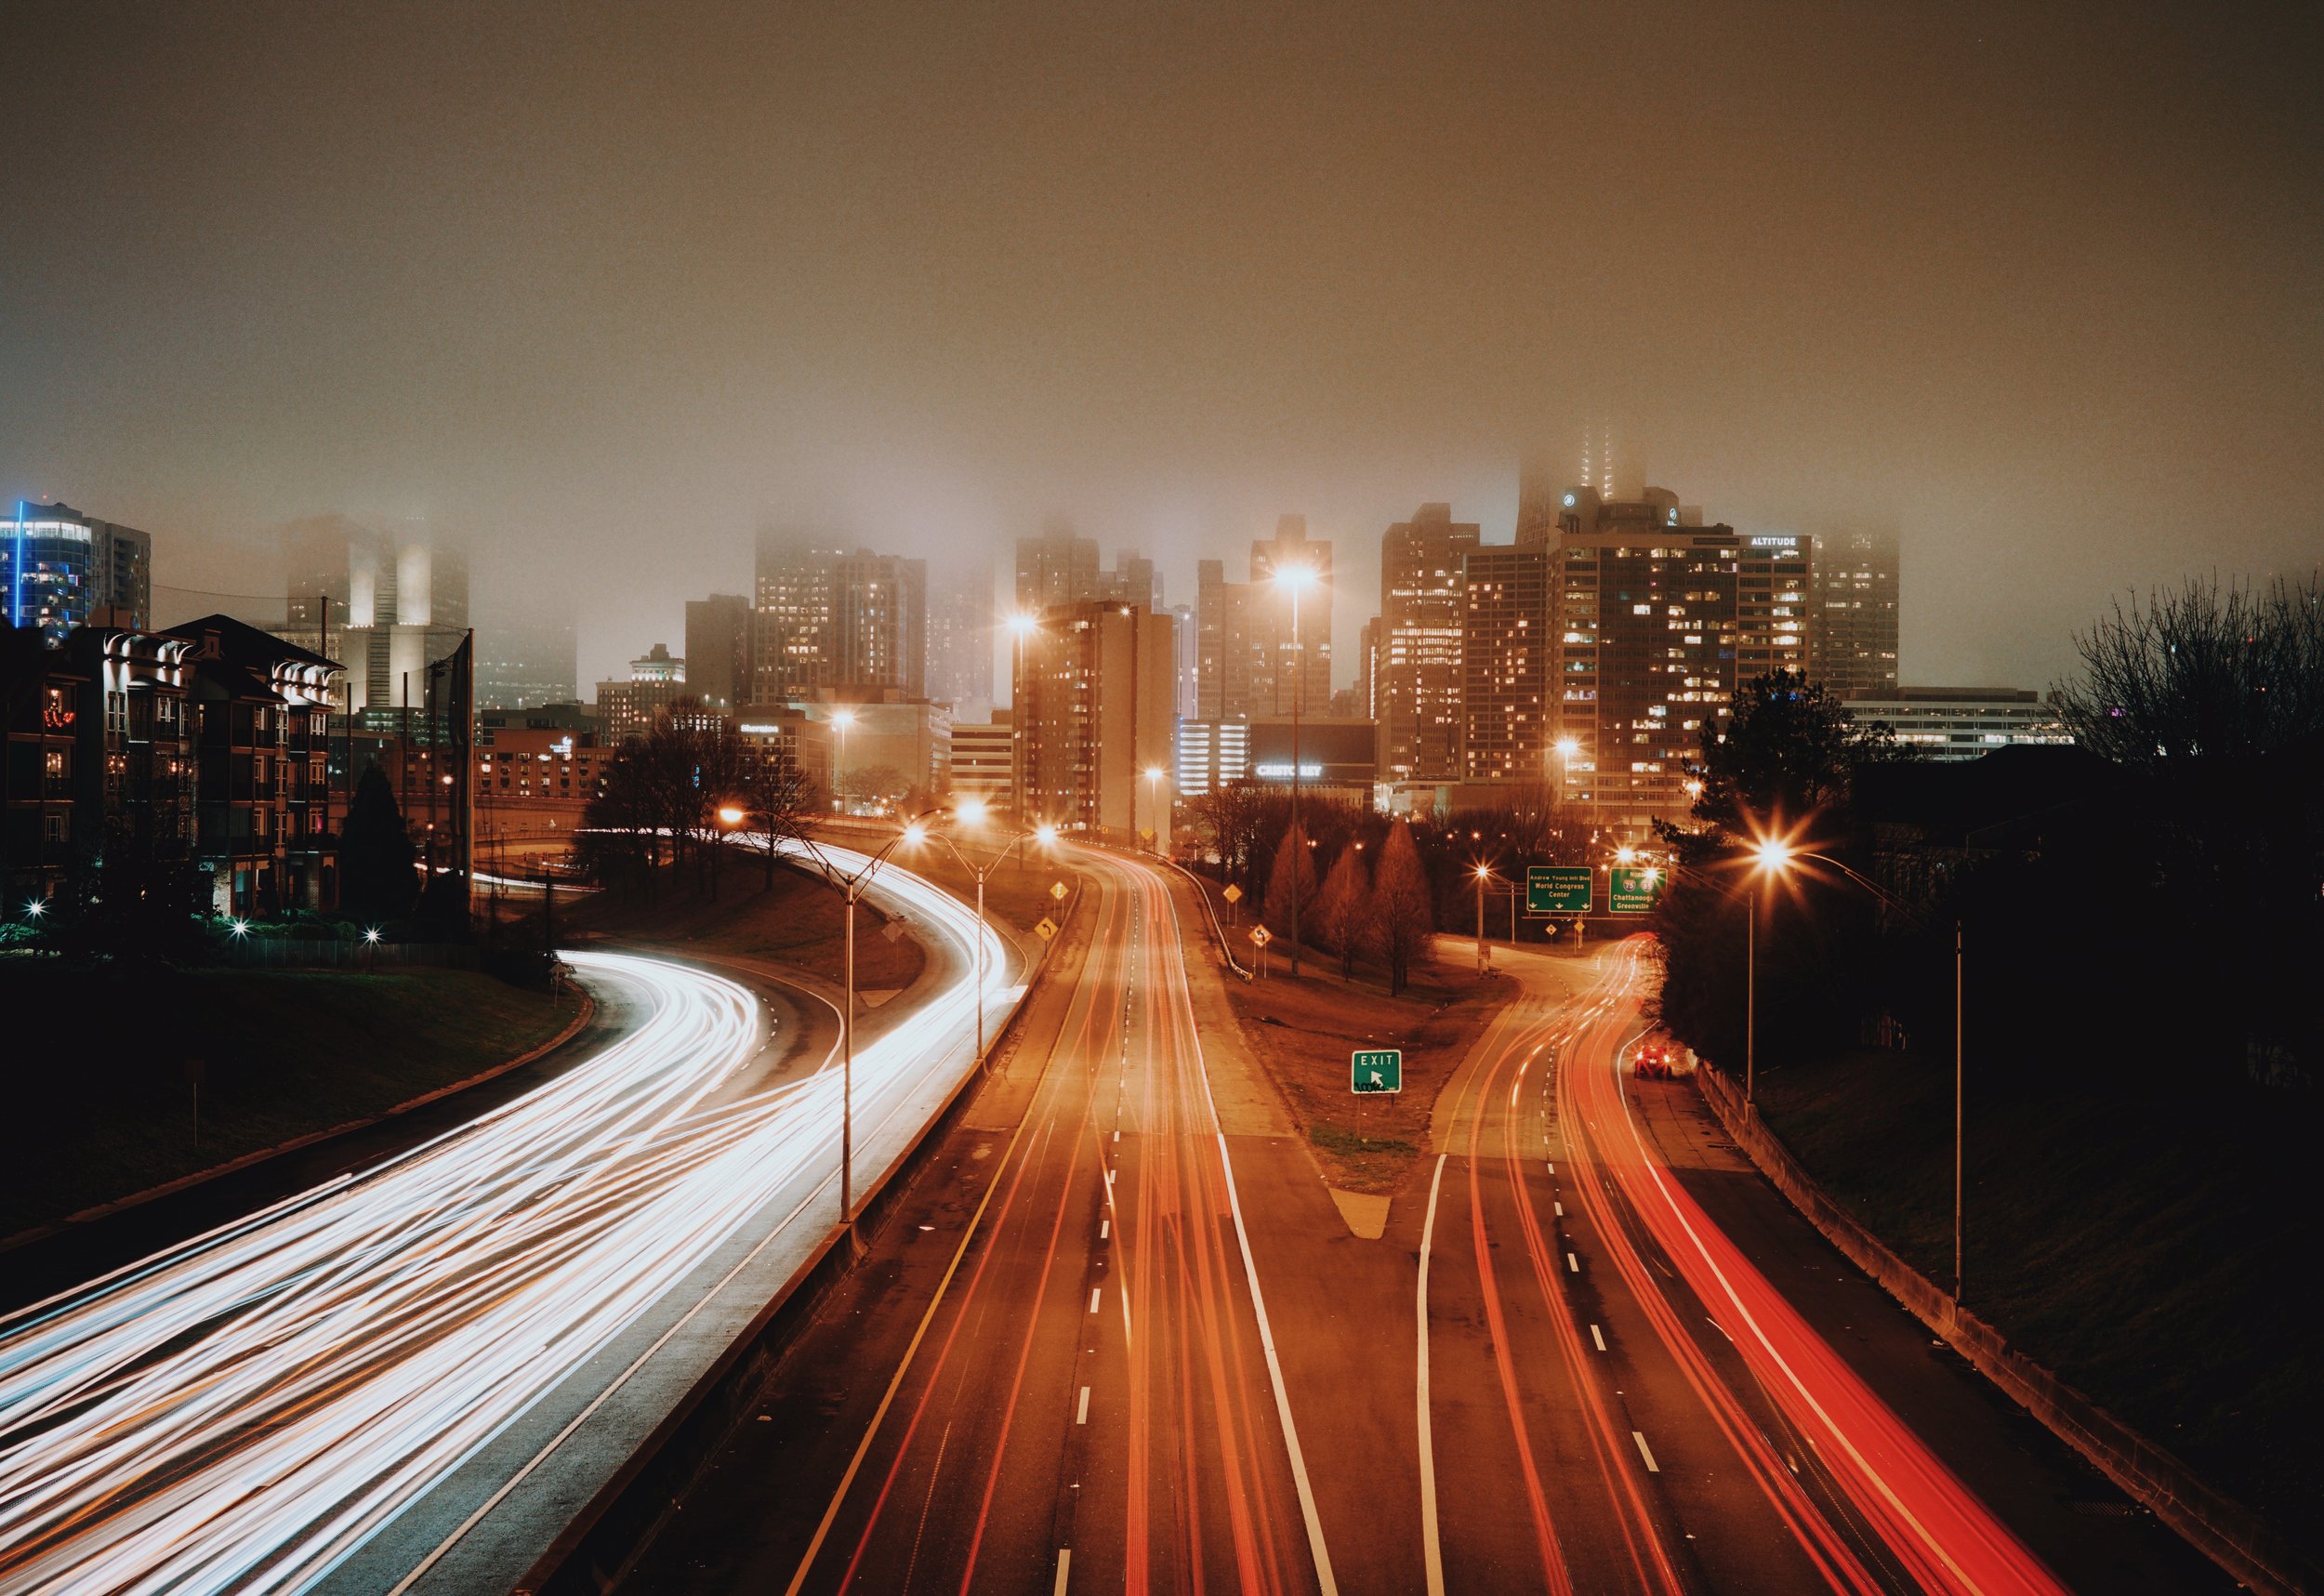
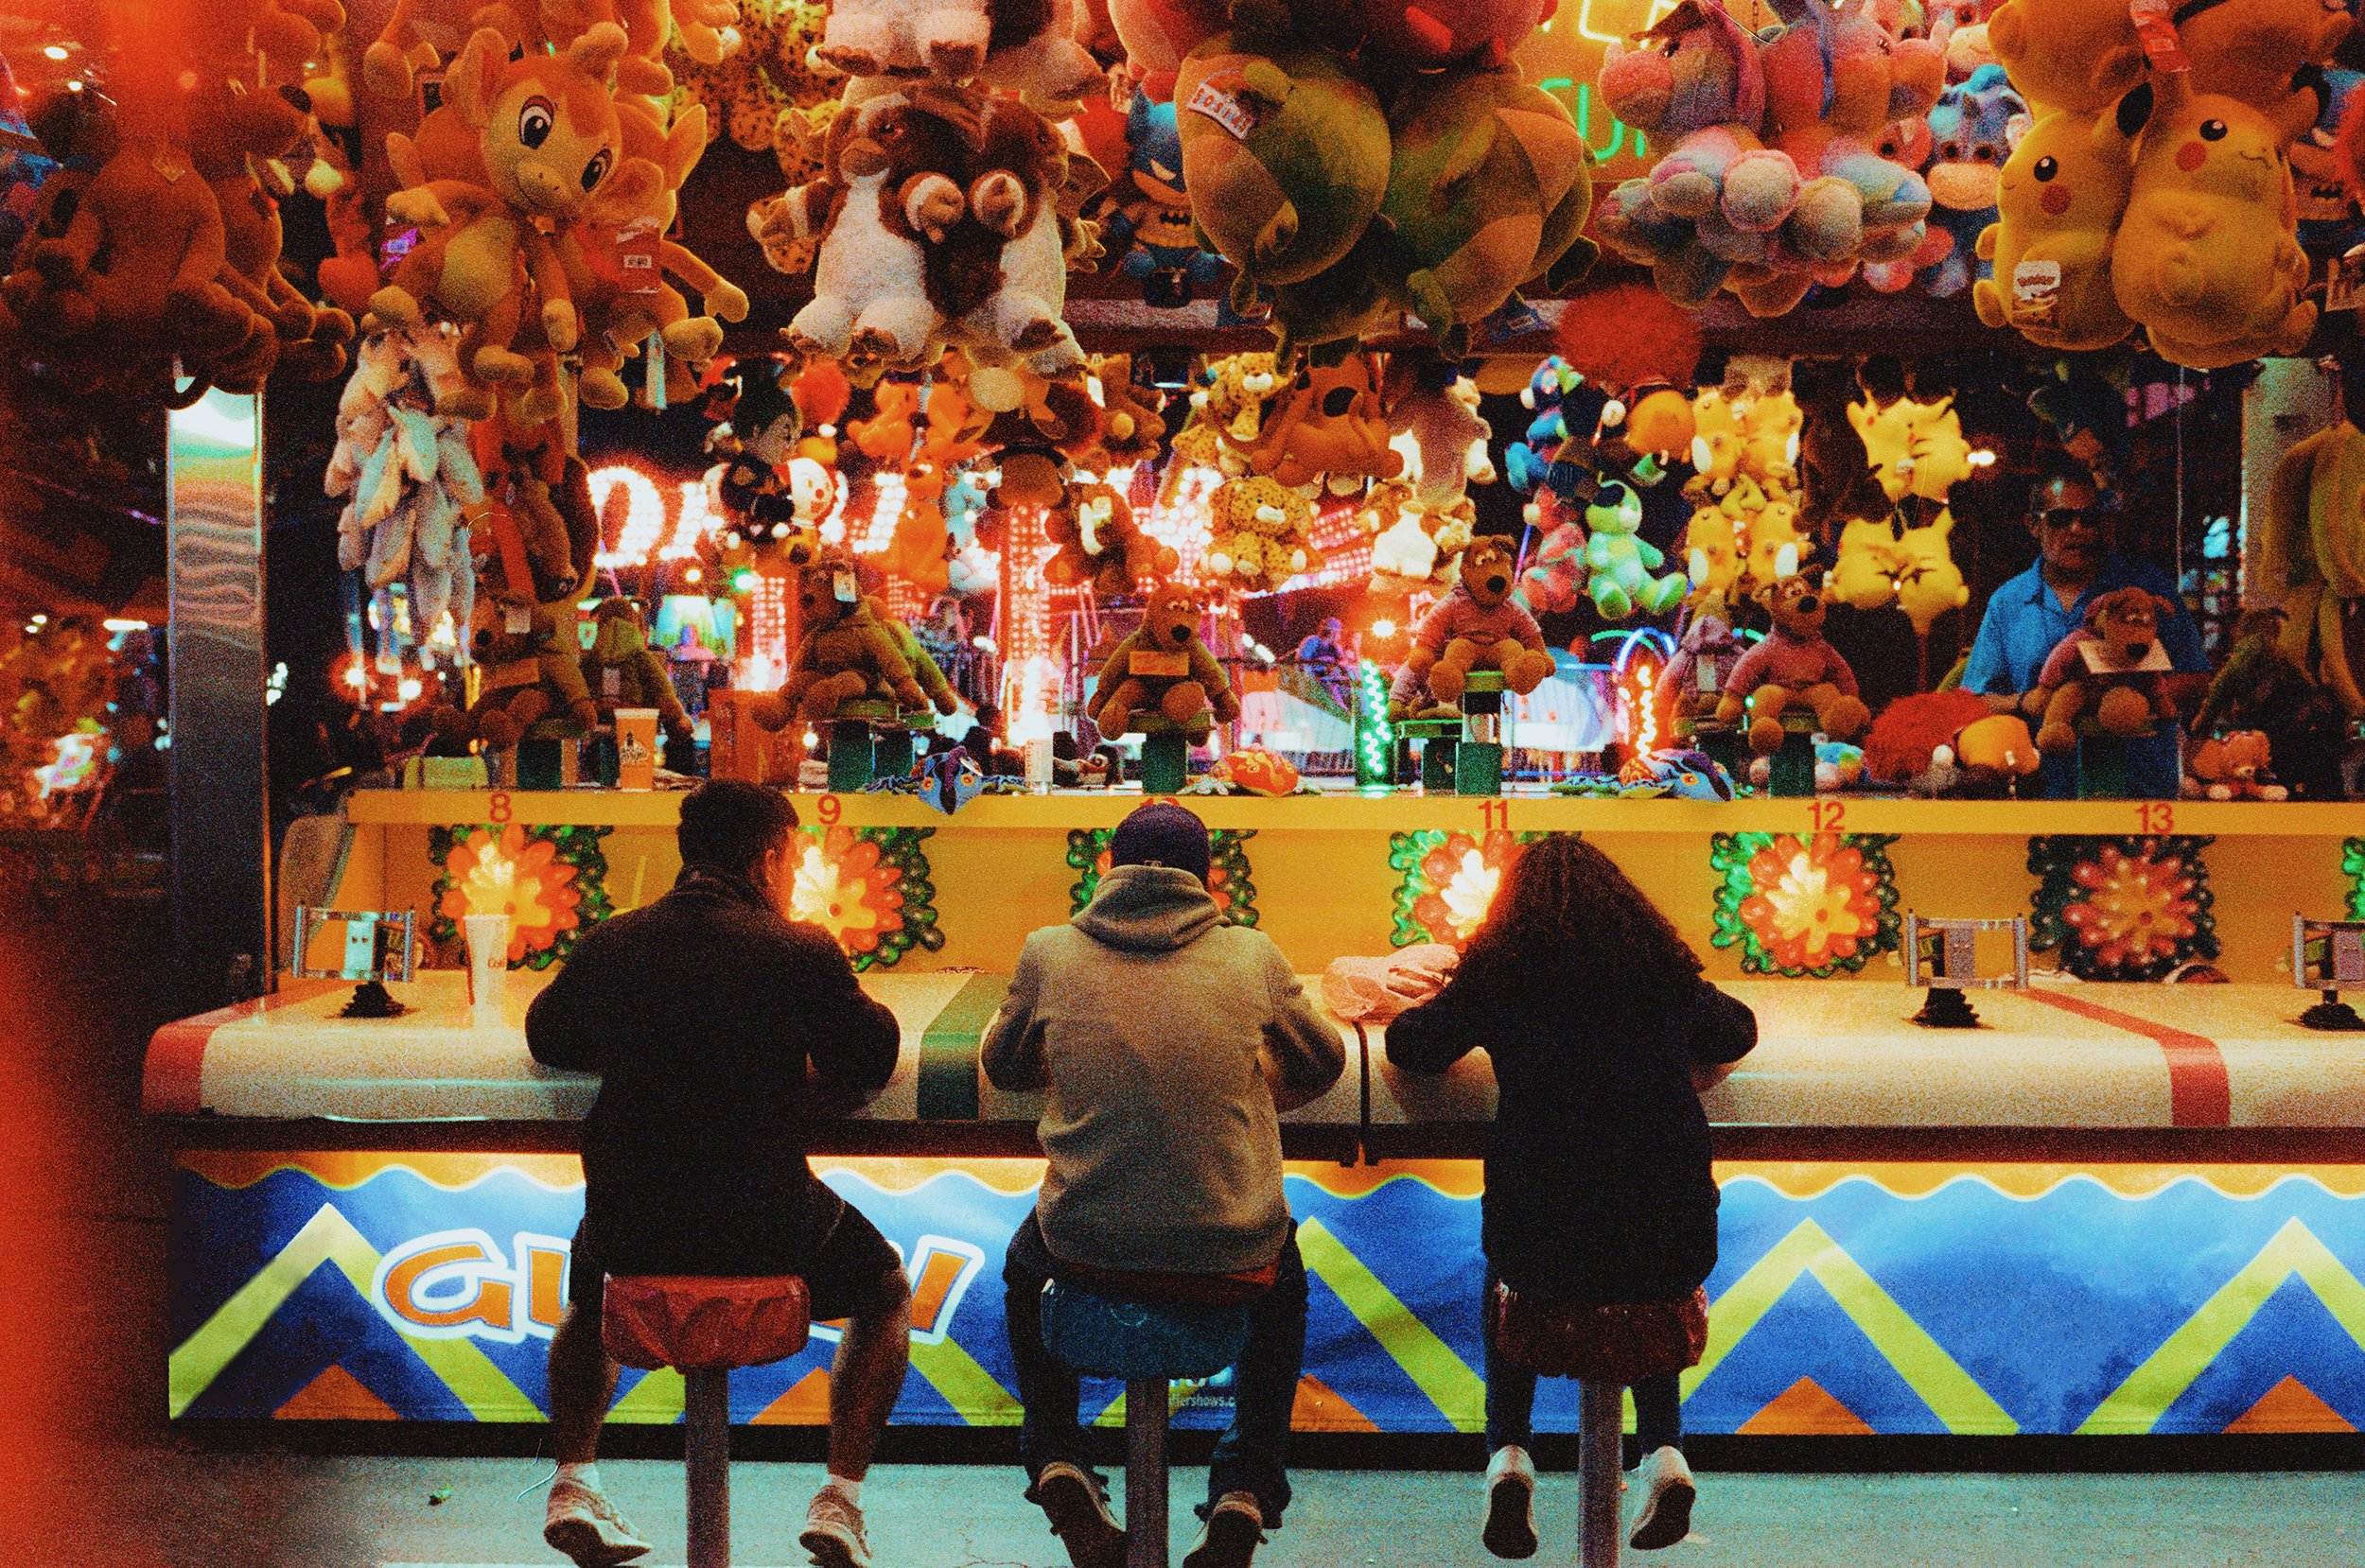
Lomography 800
Mastering Reciprocity in Analog Night Photography
Night photography on film is an art that demands a deep understanding of light and time. One of the critical technical aspects of capturing the night is mastering the concept of reciprocity failure. This phenomenon is especially prevalent in long exposures, which are common in low-light conditions.
The Science of Reciprocity Failure
In photography, reciprocity refers to the proportional relationship between the intensity of light and the duration of exposure (shutter speed) required to produce a correctly exposed image. However, during long exposures, film loses its sensitivity to light, leading to underexposed images. This deviation from the expected exposure is known as reciprocity failure.
The effect of reciprocity failure varies depending on the film stock. Some films are more susceptible to it than others. As a general rule, the longer the exposure, the more significant the deviation.
How to Combat Reciprocity Failure
To counteract reciprocity failure, photographers must extend their exposure times beyond what is metered. For example, if a light meter suggests a 30-second exposure, you may need to expose for 1 minute or even longer. The exact adjustment required can be determined using a reciprocity chart specific to the film stock you're using. You can easily find the charts online for free, but I personally use the “Reciprocity+” app to keep all the charts in one easy to access place.
Download “Reciprocity+” ($1.99)
I am not affiliated with Reciprocity+, but I do appreciate their app.
These charts provide a guideline for adjusting exposure times based on the initial metered exposure. It's important to note that these are starting points, and some experimentation may still be necessary to achieve the desired results.

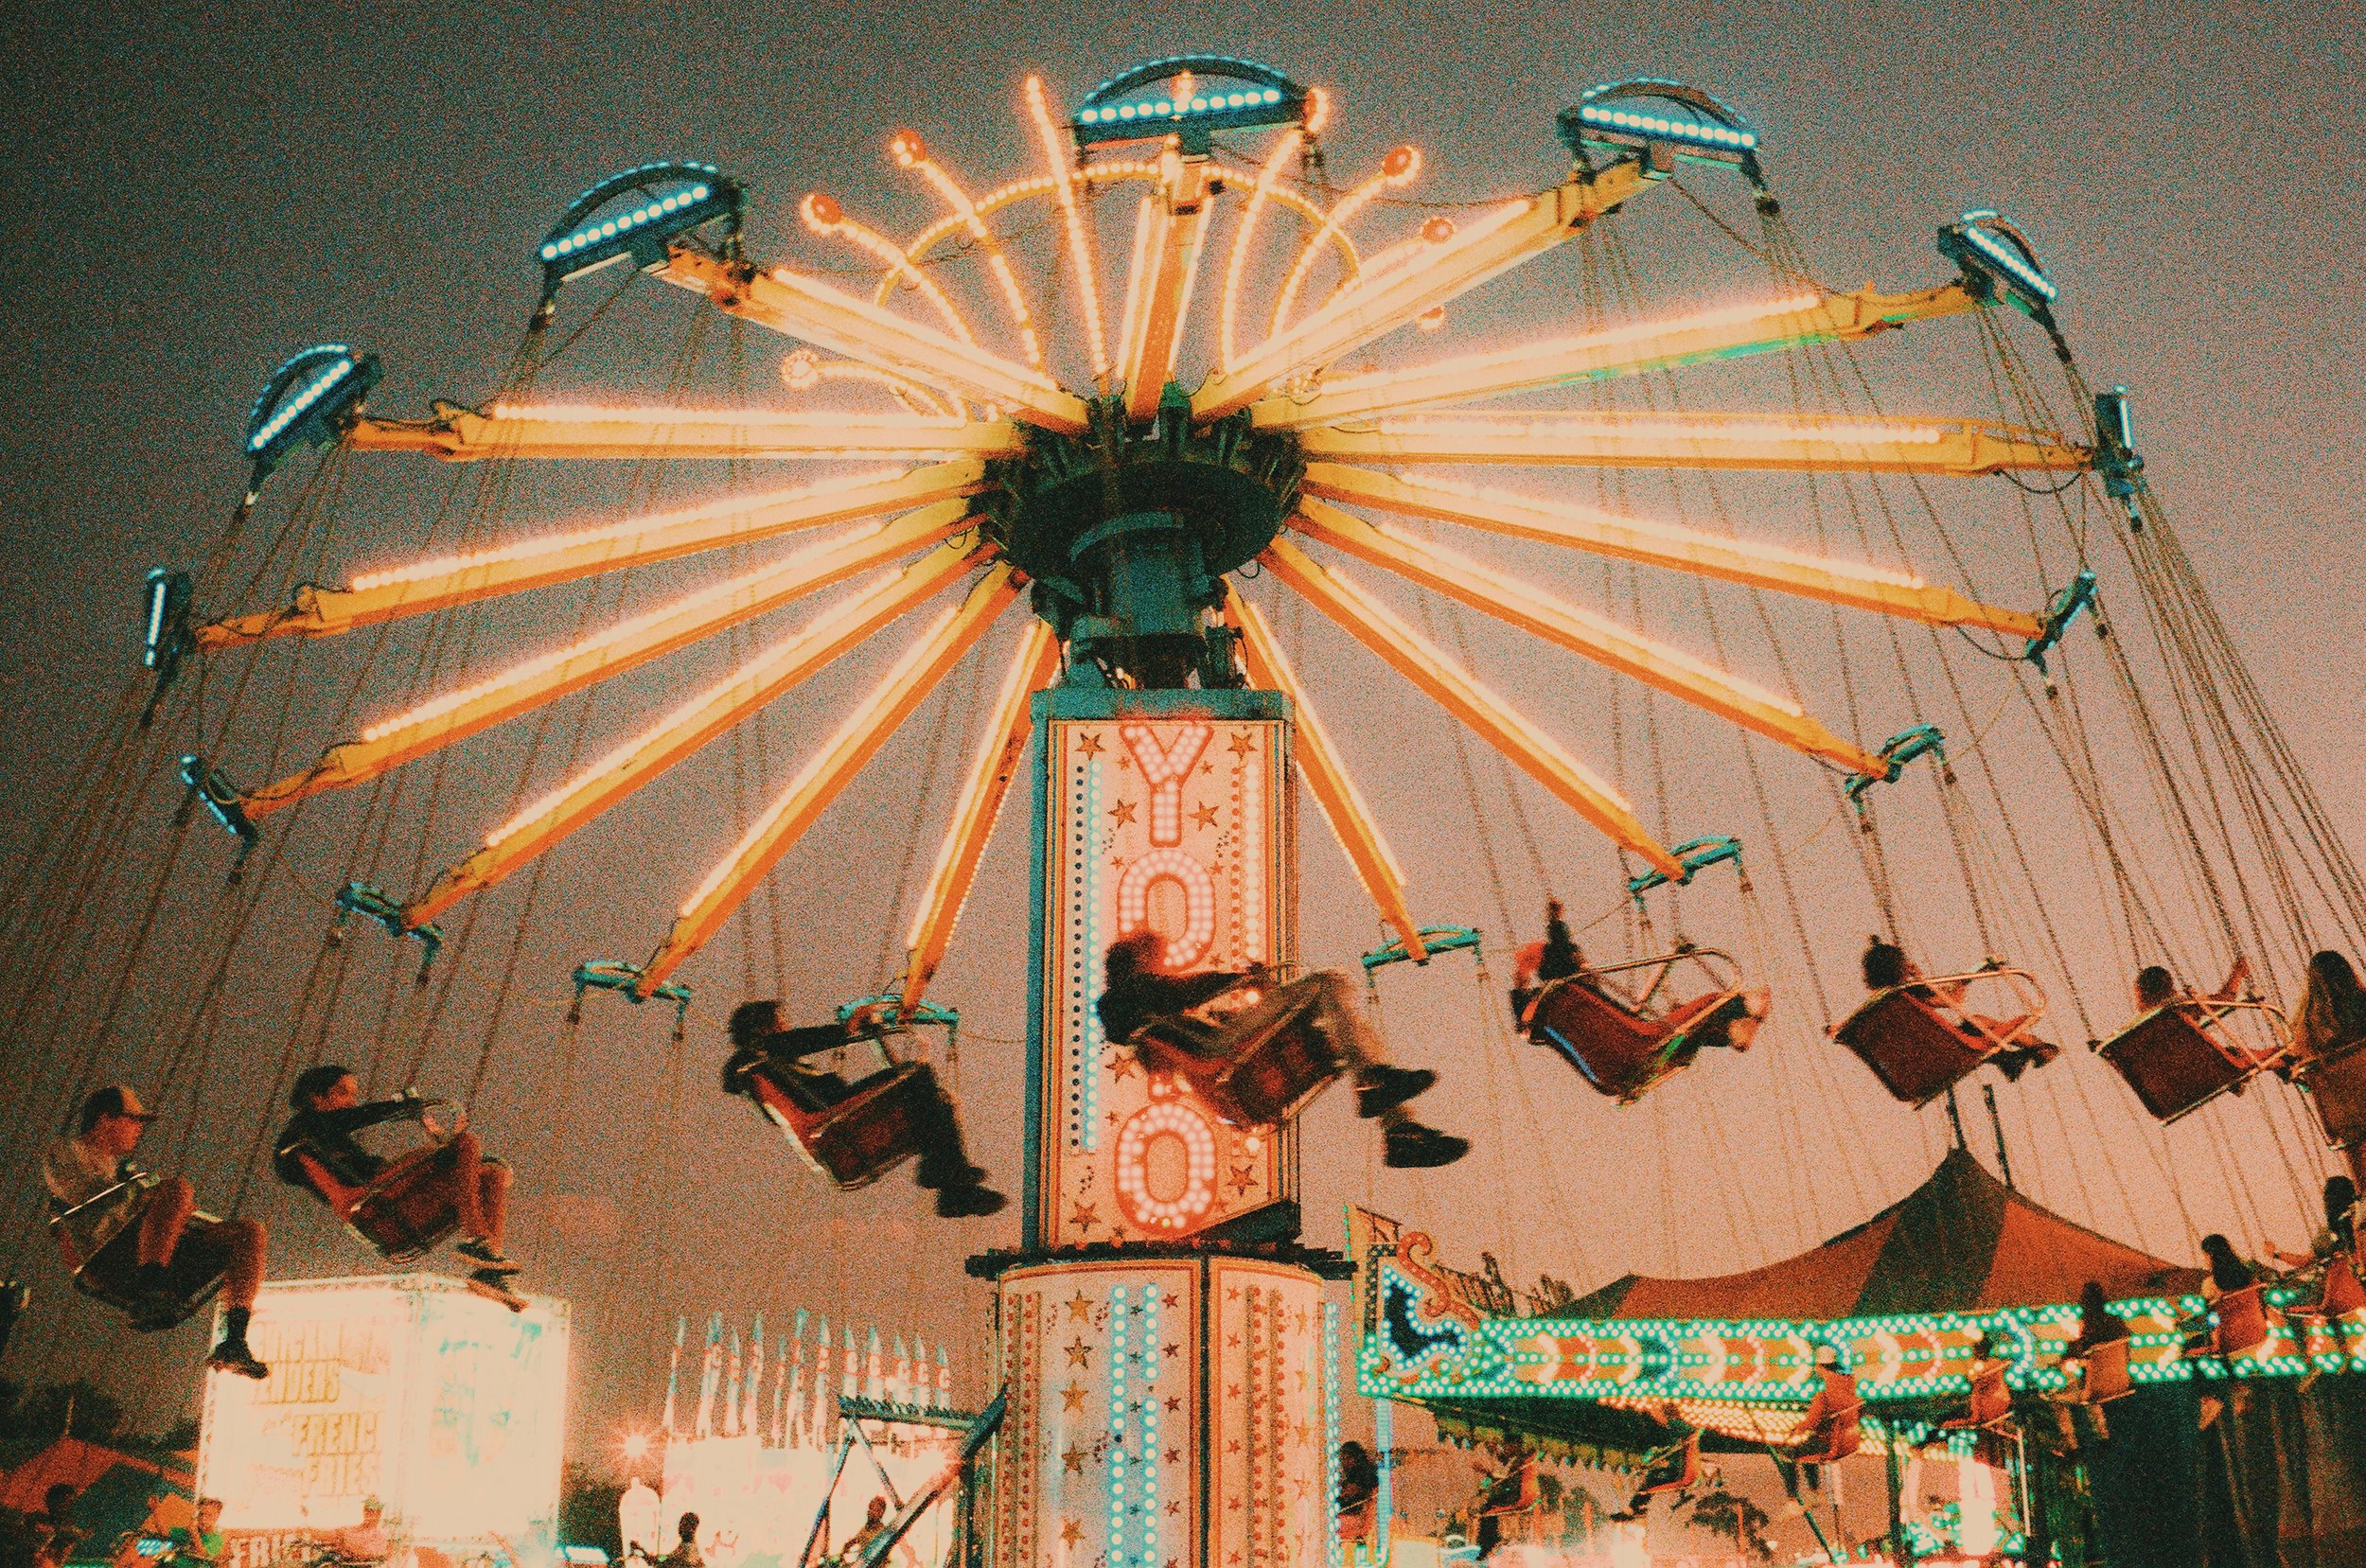
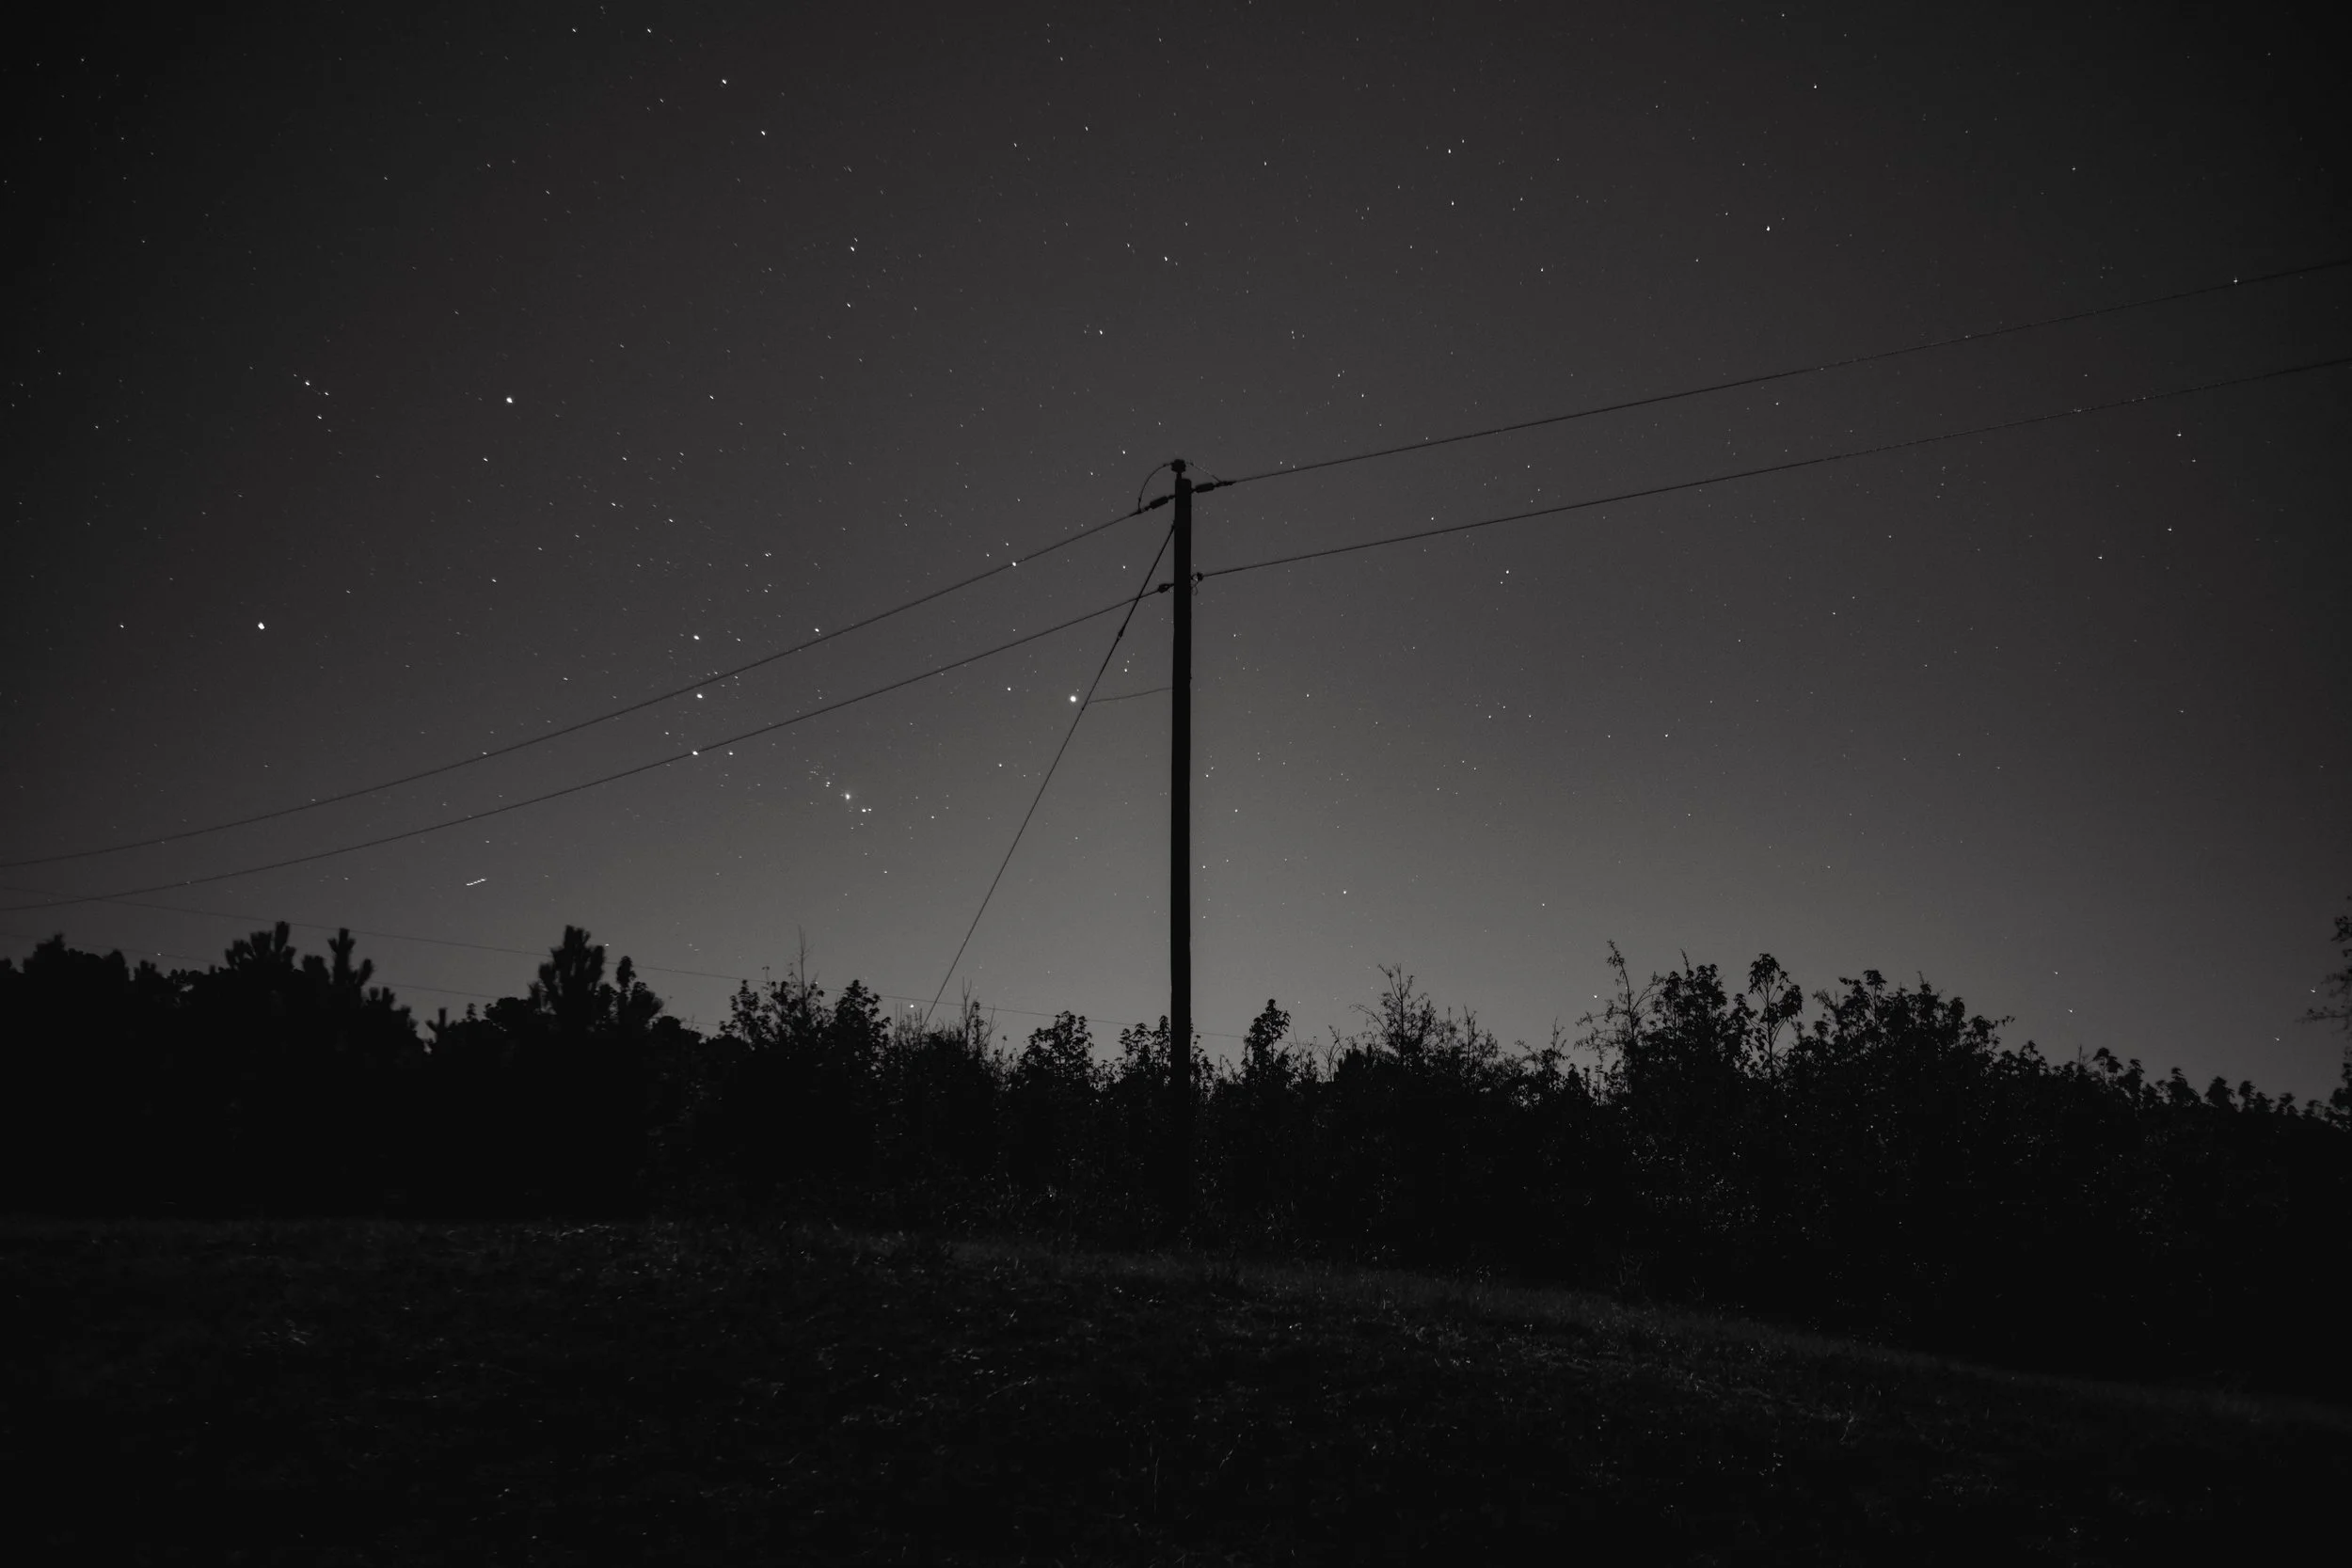
3 hour exposure on Portra 400
Choosing the Right Film for Analog Night Photography
When venturing into the realm of analog night photography, selecting the appropriate film is as crucial as mastering your camera settings. The right film can make the difference between a lackluster shot and a breathtaking capture. Here's a closer look at how to pick the perfect film for your nocturnal adventures.
Understanding Film Speed (ISO)
Film speed, denoted as ISO (or ASA), is a measure of the film's sensitivity to light. For night photography, where light is scarce, a higher ISO film is often preferred. Films like Kodak Tri-X 400, Ilford Delta 3200, Cinestill 800T, Kodak Portra 800 or my personal favorite, Lomography 800 are all popular choices due to their increased sensitivity. However, it's essential to remember that higher ISO films tend to produce more grain, which can add a gritty texture to your images.

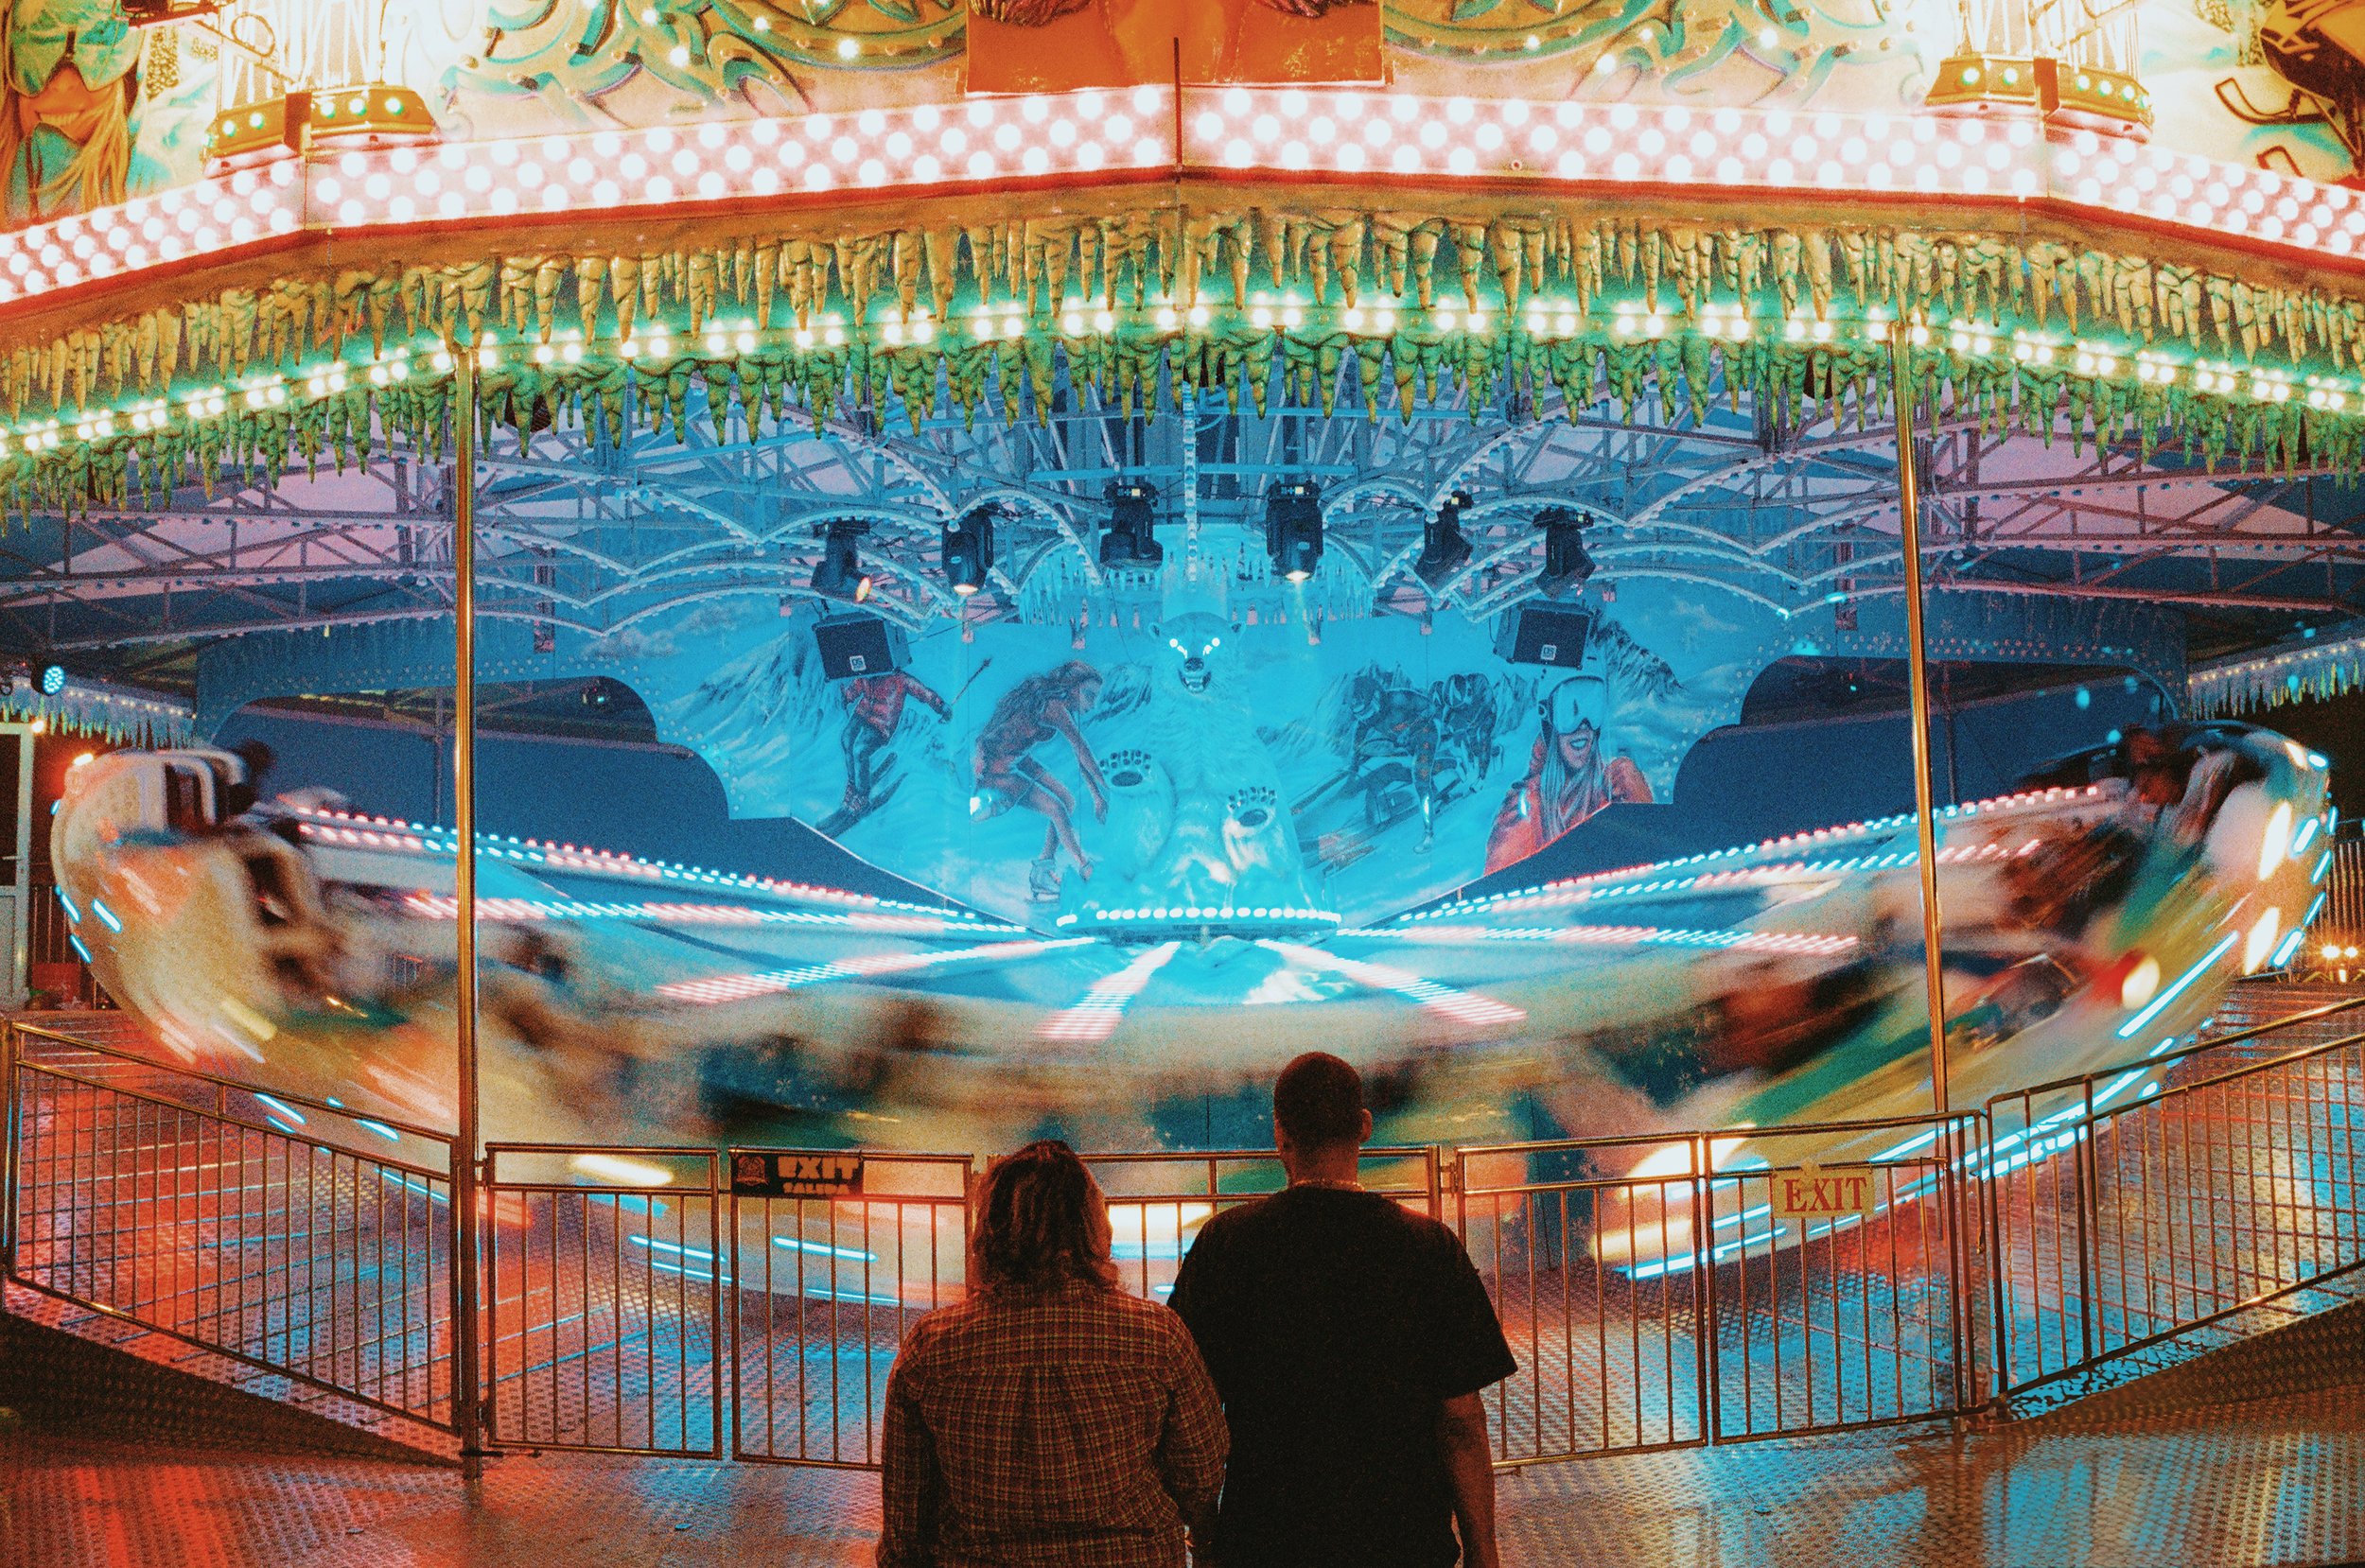
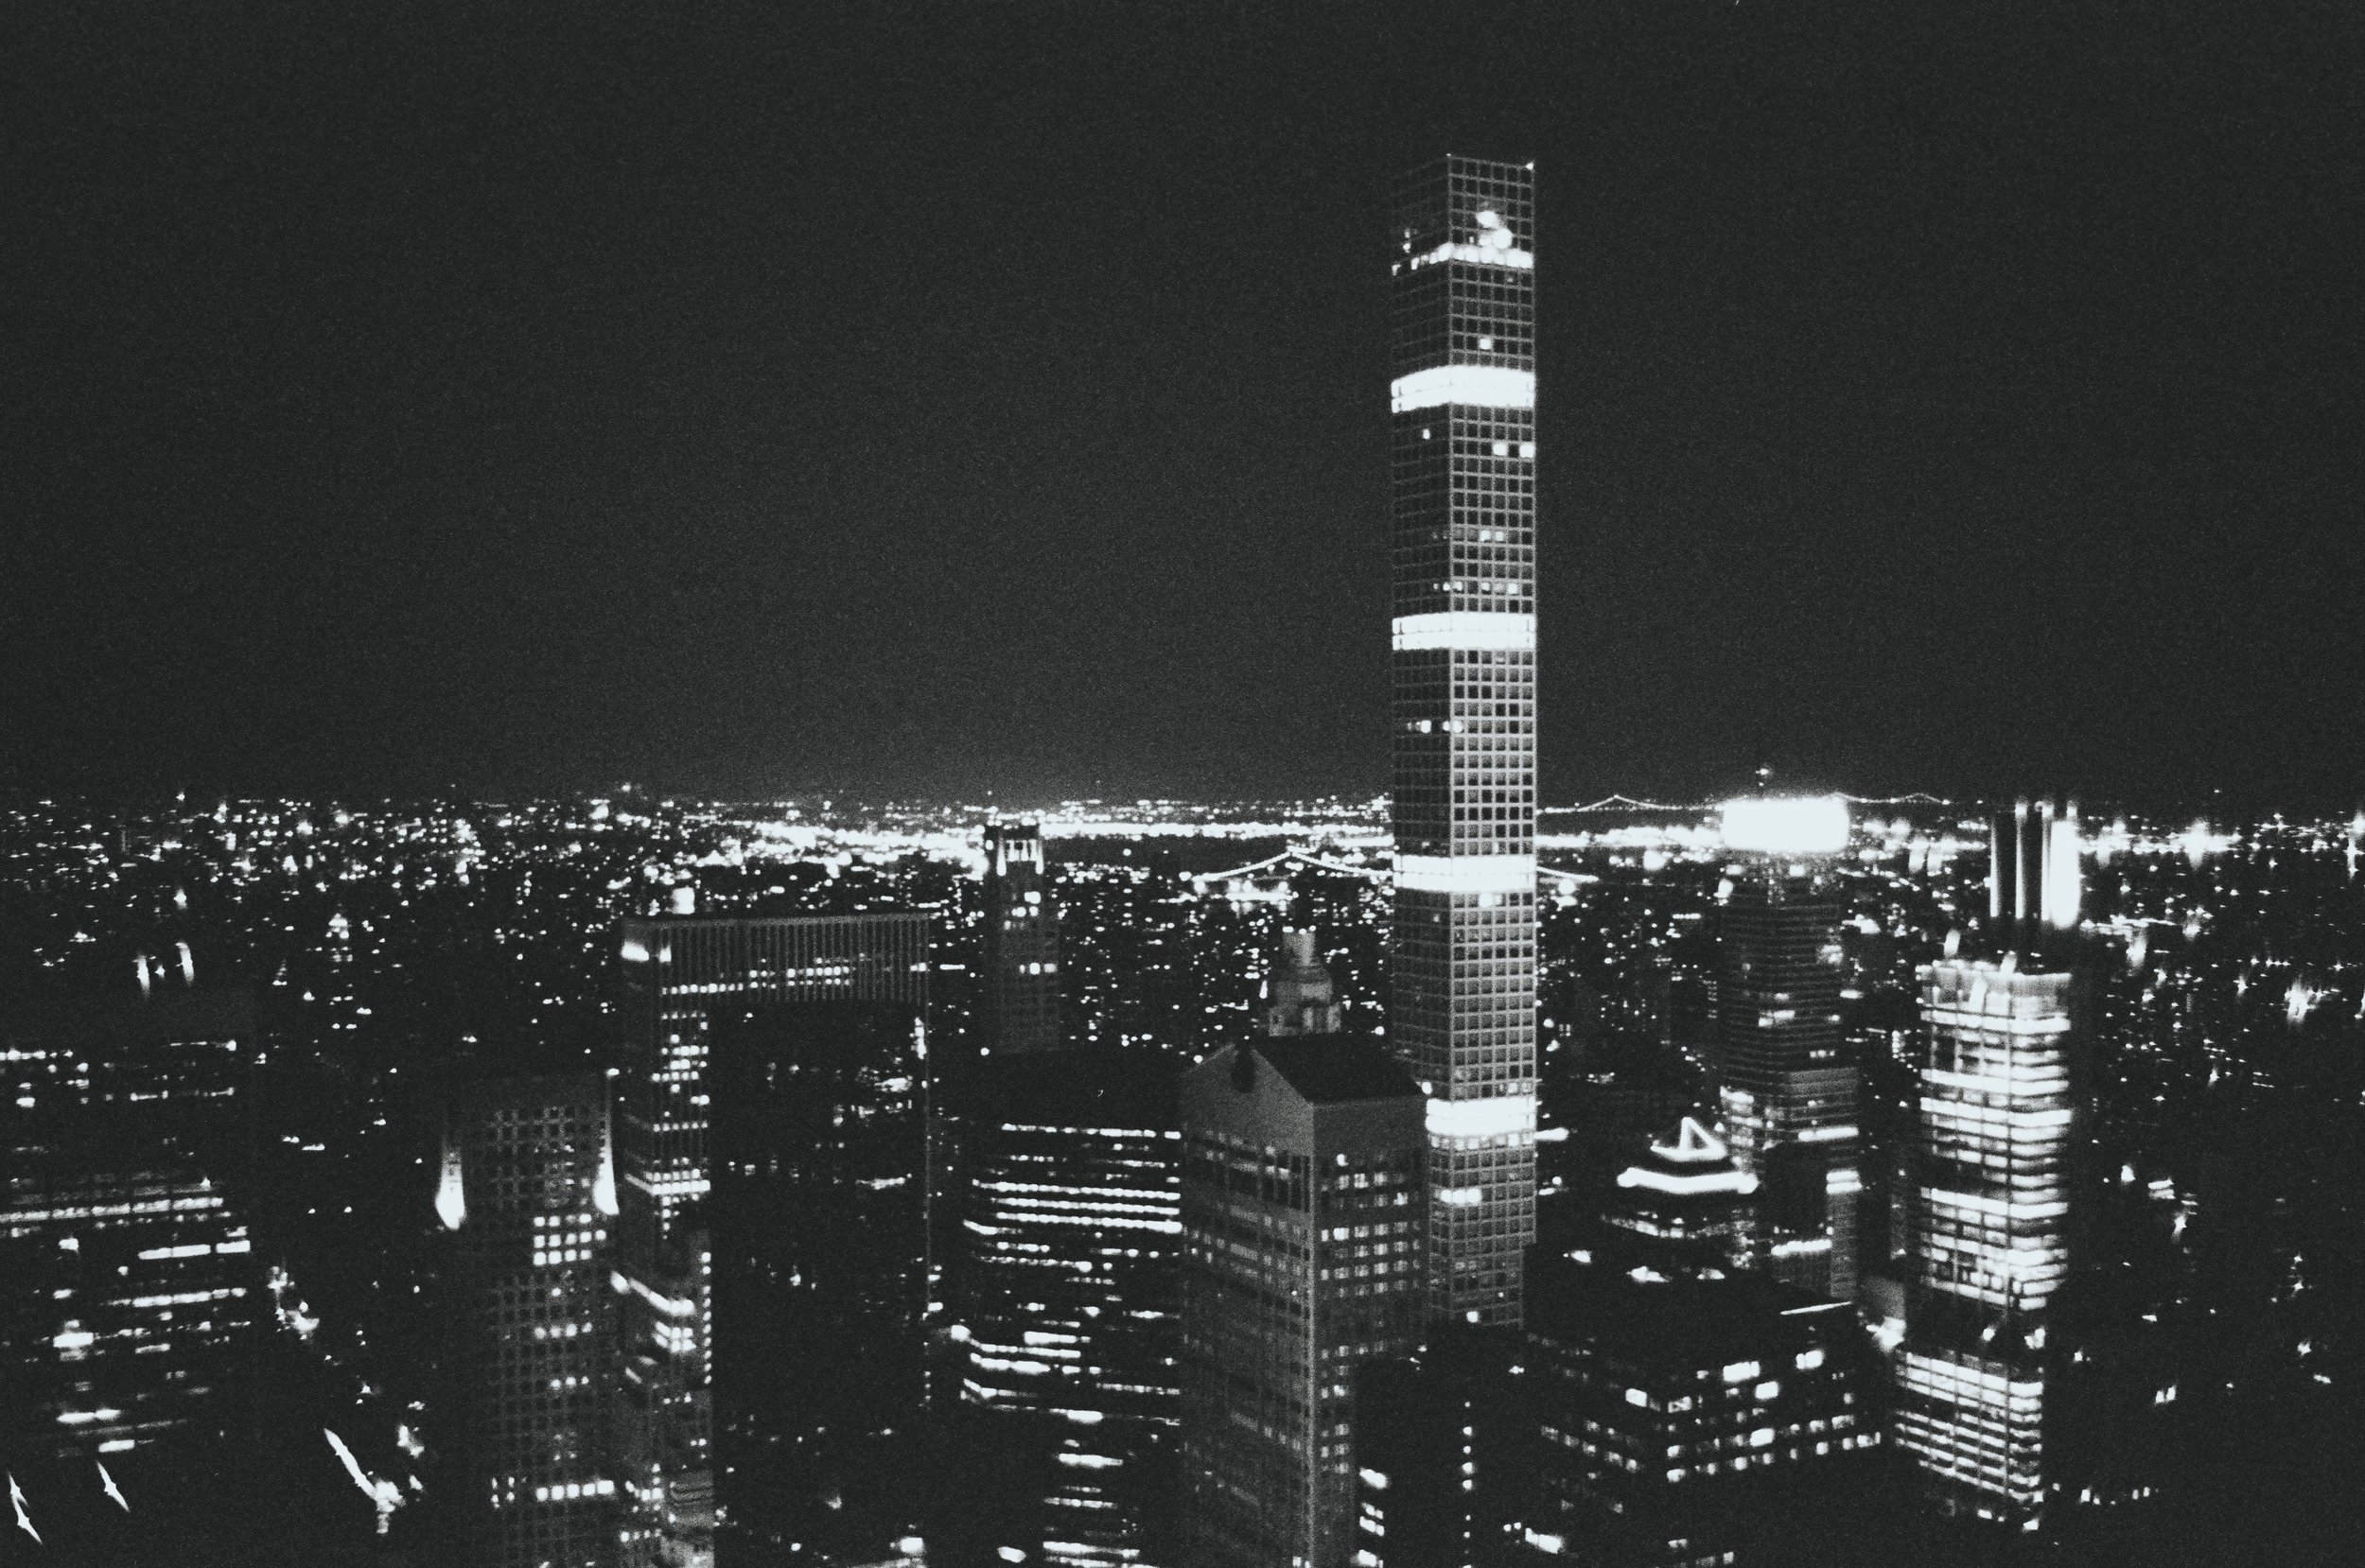
Portra 800
Balancing Grain and Aesthetics
While grain can be a desired effect for some, others may prefer a smoother look. If you're aiming for finer grain, consider using a lower ISO film and a tripod to stabilize longer exposures. Films like Kodak Portra 160 or Fuji Pro 400H offer a finer grain structure while still providing good latitude for exposure adjustments.
Color vs. Black and White
The choice between color and black and white film can significantly impact the mood and atmosphere of your night photos.
Black and White Film: Offers a classic, timeless look and is often more forgiving in terms of exposure and development. It accentuates contrasts, textures, and shapes, making it ideal for capturing the dramatic interplay of light and shadow at night.
Color Film: Brings the vibrancy of the night to life, capturing the myriad hues of artificial lights. Films like Kodak Portra 800 or Cinestill 800T are favored for their ability to handle mixed lighting conditions and their excellent color rendition in low light.

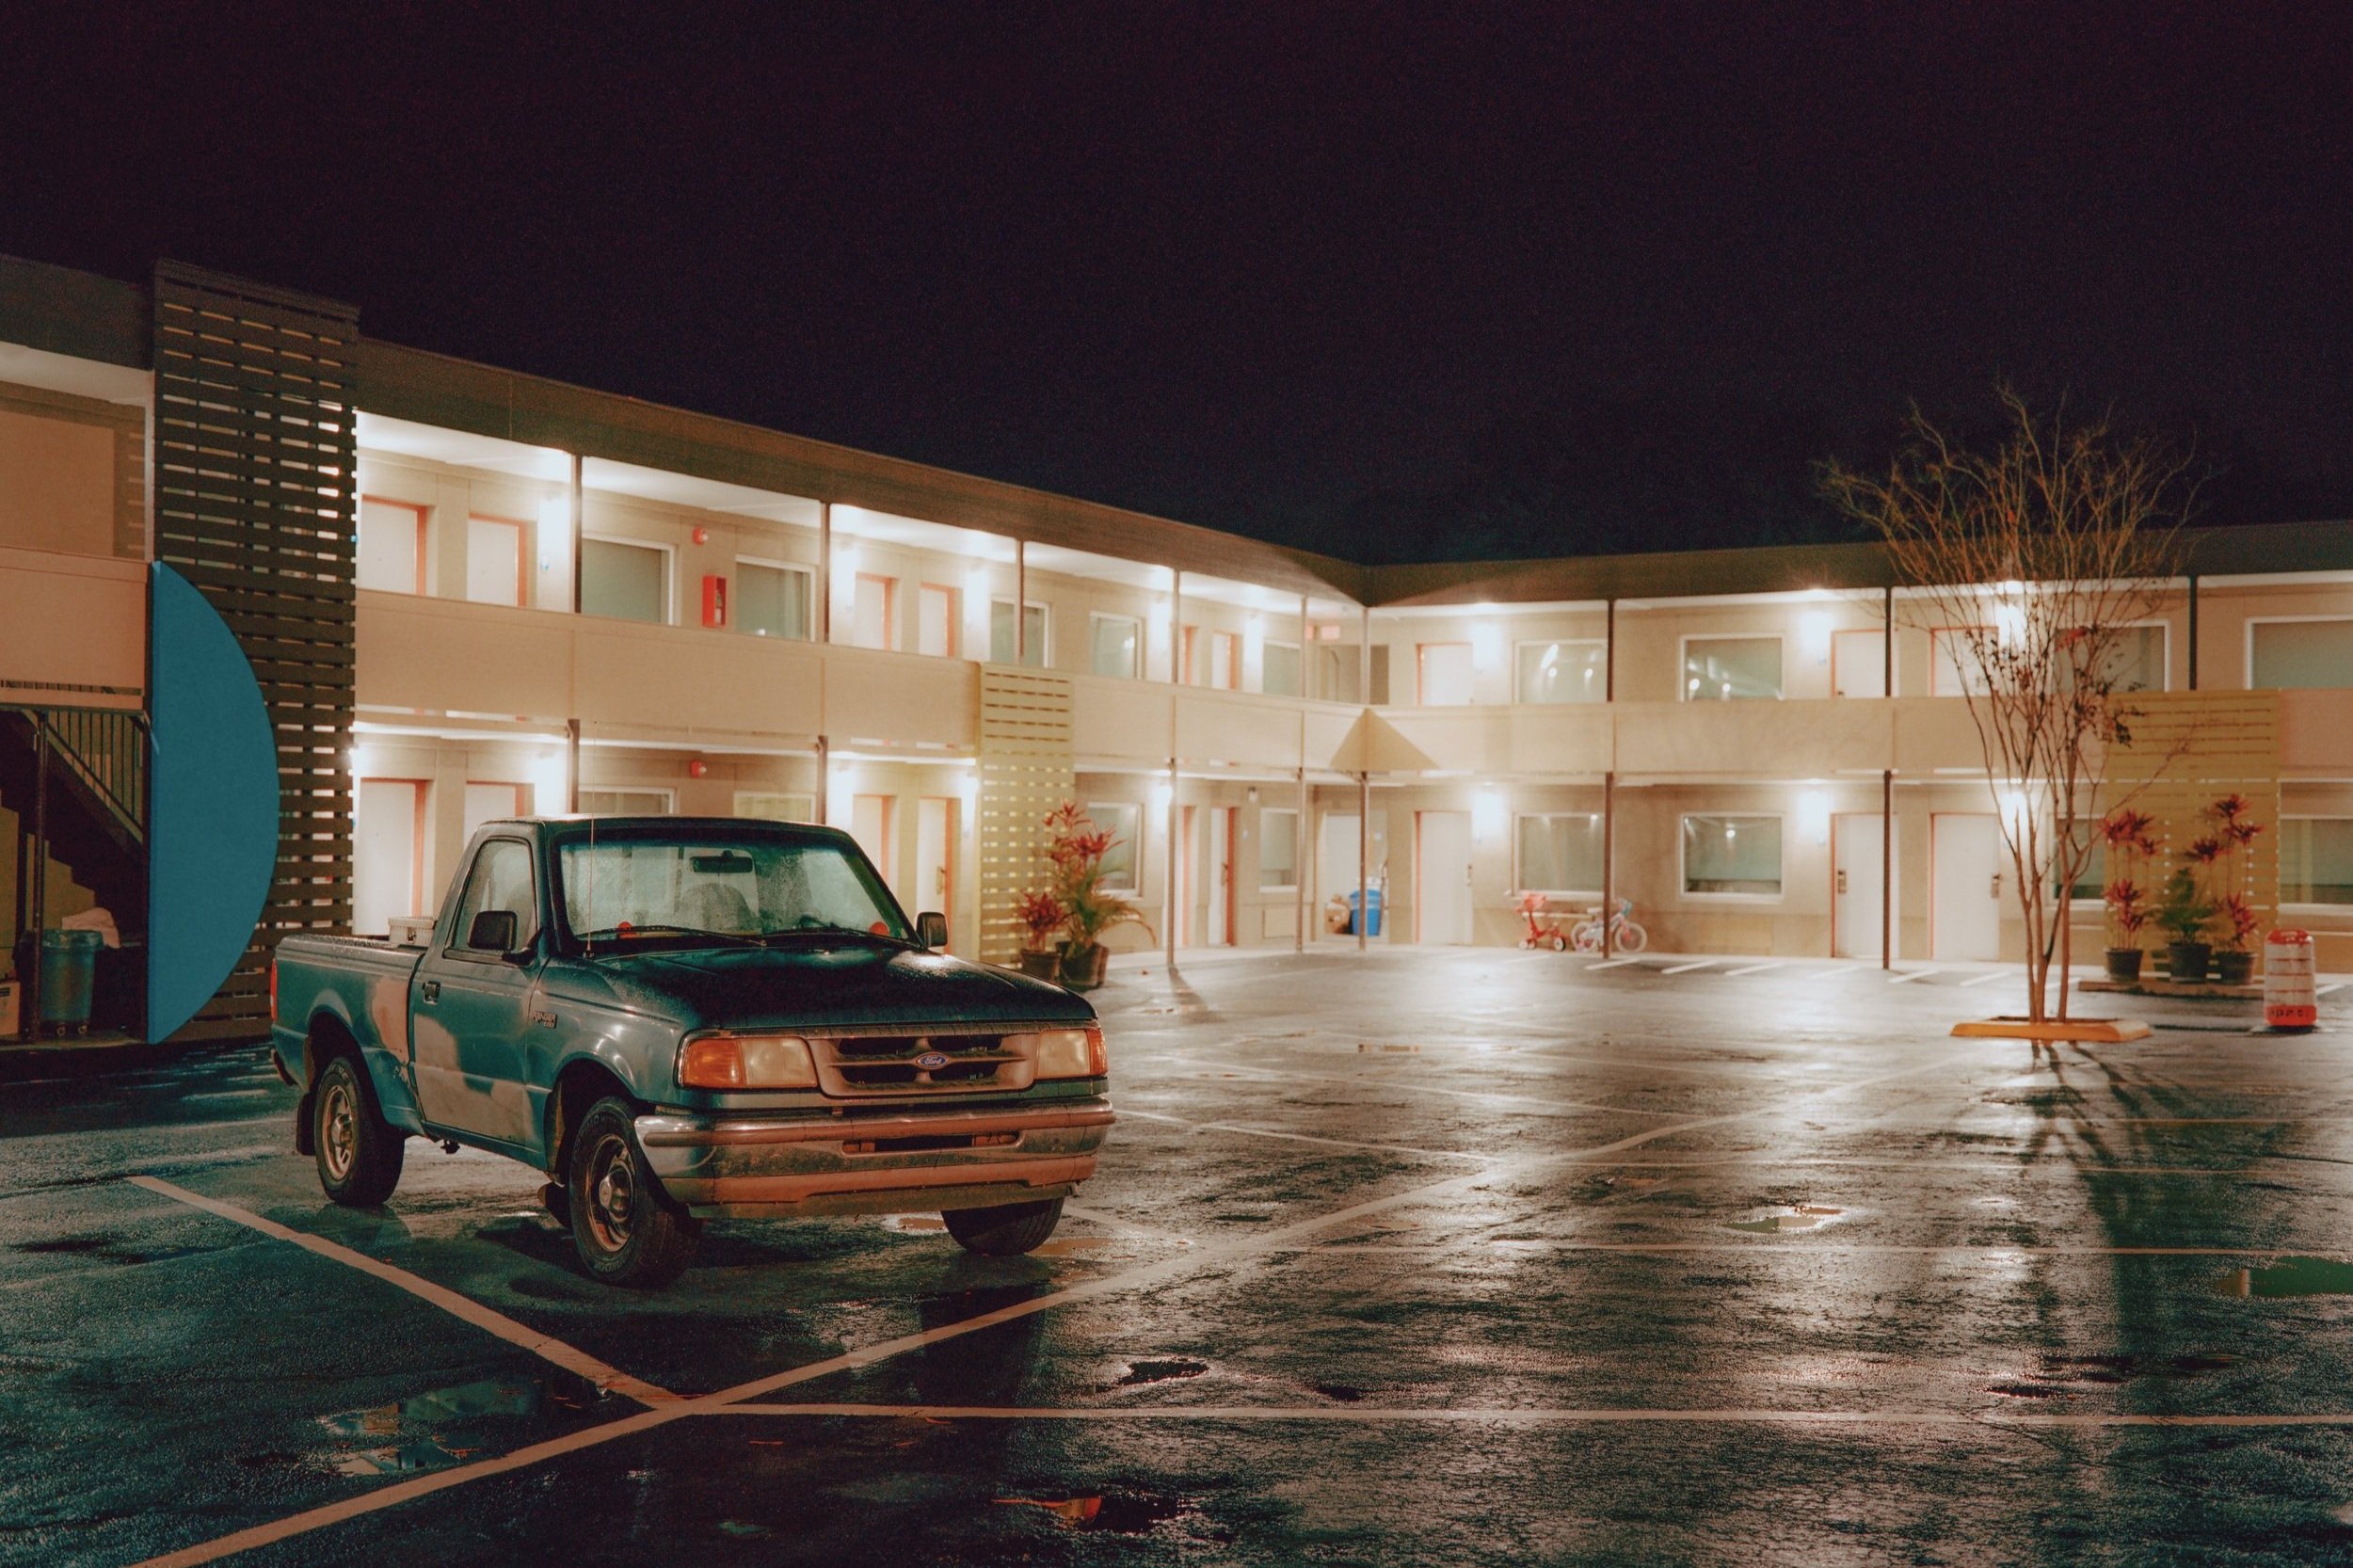
Cinestill 800T
Specialized Films for Unique Effects
Some films are specifically designed for low-light conditions or offer unique characteristics that can enhance your night photography:
Cinestill 800T: This film is known for its cinematic quality, halation (red glow), and tungsten balance, making it perfect for capturing the warm glow of city lights.
Ilford SFX 200: A medium-speed black and white film with extended red sensitivity, allowing for creative effects with the use of red filters, such as darkening skies or emphasizing atmospheric elements.
Choosing the right film for analog night photography is an art in itself. Consider the lighting conditions, the desired aesthetic, and the characteristics of different film stocks. Experiment with various films to find the ones that best suit your style and the unique challenges of night photography. With the right film in your camera, the magic of the night awaits!
Experimenting with Exposure in Analog Night Photography
The allure of analog night photography lies not just in capturing the beauty of the night, but in the creative process of experimentation. Unlike digital photography, where immediate feedback is available, film photography demands a more thoughtful approach, especially when dealing with the complexities of night exposures. Here's how to embrace the experimental nature of analog night photography to achieve stunning results.
Understanding Exposure Basics
Exposure in photography is determined by three main elements: aperture, shutter speed, and film sensitivity (ISO). In night photography, the challenge is to balance these elements to capture enough light without compromising the image's sharpness or introducing unwanted grain.
Aperture: A wider aperture (lower f-number) allows more light to enter the camera, which is crucial in low-light conditions. However, this also affects the depth of field, so it's essential to find the right balance for your scene.
Shutter Speed: Longer shutter speeds are necessary to capture more light at night, but they can also lead to motion blur. A tripod is essential to keep the camera steady during long exposures.
ISO: While a higher ISO film can be more sensitive to light, it also increases the grain. Choose a film that aligns with your desired aesthetic.
For a more in-depth look at exposure, I have a blog post about it!

Bracketing Exposures
Bracketing is a technique where you take multiple shots of the same scene at different exposure settings. This is particularly useful in night photography, where the correct exposure can be challenging to gauge. Start with the exposure suggested by your light meter (accounting for reciprocity failure), then take additional shots at one or two stops above and below that value. This increases your chances of getting a well-exposed image and helps you understand how different settings affect the outcome.
Push and Pull Processing
Experimenting with exposure can also extend into the development process. Push processing involves developing the film for a longer time or at a higher temperature than usual, effectively increasing the film's sensitivity. This can be useful if you've underexposed your shots. Conversely, pull processing decreases sensitivity, which can be helpful for overexposed images. Both techniques alter the contrast and grain of the final image, so they can be used creatively to achieve your desired look.
Exploring Long Exposures
Long exposures are a hallmark of night photography, allowing you to capture stunning light trails, starry skies, or illuminated landscapes. However, they require careful calculation and experimentation. Use a cable release or remote shutter to avoid camera shake, and consider using a neutral density filter to control the amount of light entering the lens for very long exposures.
Composing the Darkness: Crafting Visual Stories in Analog Night Photography
1. Embrace the Shadows
Night photography is as much about what's hidden in the shadows as what's illuminated. Use the interplay of light and dark to create depth and intrigue in your compositions. Shadows can lead the viewer's eye into the frame or create patterns that add a dynamic element to your images.
2. Find Your Light Sources
In the absence of natural light, artificial lights become the main focus. Street lamps, neon signs, car headlights, and windows can all serve as light sources that define your composition. Use these lights to highlight subjects, create silhouettes, or add a unique splash of artificial lighting.
3. Use Leading Lines
Leading lines are a powerful compositional tool, especially at night. They can guide the viewer's eye through the image and add a sense of direction. Look for lines created by roads, bridges, buildings, or even light trails from moving vehicles.
4. Incorporate Reflections
Water surfaces, wet streets, and glossy surfaces can provide stunning reflections at night. These reflections can double the visual impact of your light sources and add symmetry to your compositions. Position your camera at the right angle to capture the reflection and the source in a harmonious balance.
5. Frame Your Shots
Framing can add depth to your night photographs and focus attention on your main subject. Use architectural elements, tree branches, or other objects to create a natural frame around your subject. This technique can also help to isolate your subject from potentially distracting backgrounds.
6. Experiment with Different Perspectives
Don't be afraid to explore different angles and perspectives. Shooting from a low angle can make ordinary objects appear more dramatic under the night sky. Conversely, a high vantage point can provide a bird's-eye view of the illuminated cityscape.
7. Capture Movement
Long exposures allow you to capture the movement of light, creating dynamic and energetic compositions. Experiment with capturing the trails of moving cars, the flow of water, or even the movement of stars in the sky.
Experimenting with exposure in analog night photography is a journey of discovery. Each roll of film offers a new opportunity to explore the interplay of light and shadow, aperture and shutter speed, film sensitivity and development. Embrace the unpredictability, learn from your successes and mistakes, and let your creativity shine through the darkness of the night.

In Conclusion: The Enchanting World of Analog Night Photography
Analog night photography is a journey into a world where light and darkness dance together, creating a stage for the photographer's vision. It's a realm where the ordinary becomes extraordinary, and the overlooked details of the night reveal their hidden beauty. As you venture into this captivating world, remember that each frame you capture is a unique expression of your artistic perspective.
Embracing the challenges and uncertainties of analog photography at night is part of the adventure. The limitations of film, the unpredictability of exposure, and the interplay of light and shadow all contribute to the magic of the final image. These constraints encourage creativity, pushing you to explore new techniques, experiment with different compositions, and see the world through a different lens.
The beauty of analog night photography lies in its ability to evoke emotions and tell stories. A well-composed night photograph can transport the viewer to a moment frozen in time, a moment of quiet introspection, or a vibrant scene of urban life. It's a medium that allows you to capture the essence of the night in a way that digital photography often cannot replicate.
As you continue your journey in analog night photography, cherish the process as much as the outcome. Each roll of film is an opportunity to learn, grow, and refine your craft. The anticipation of waiting for your film to be developed adds to the excitement, making the moment of seeing your images for the first time all the more rewarding.
In the end, the enchanting world of analog night photography is a testament to the enduring power of film. It's a reminder that in our fast-paced digital age, there's still a place for the slow, deliberate, and deeply personal art of capturing the night on film. So load your camera, venture into the darkness, and let the magic of the night inspire your creativity. The world is waiting to see your vision of the night.
Some links on my blog are affiliate links. This means if you decide to make a purchase through these links, I may receive a small commission at no additional cost to you. It's a wonderful way to support the content I create, and I only recommend products I genuinely love and believe in. Your support means the world to me, and I'm grateful for every click, purchase, and kind word.